Create a sensor asset
Sensors allow you to automate workflows based on external events or conditions, making them useful for event-driven automation, especially in situations where jobs occur at irregular cadences or in rapid succession.
Consider using sensors in the following situations:
- Event-driven workflows: When your workflow depends on external events, such as the arrival of a new data file or a change in an API response.
- Conditional execution: When you want to execute jobs only if certain conditions are met, reducing unnecessary computations.
- Real-time processing: When you need to process data as soon as it becomes available, rather than waiting for a scheduled time.
In this step you will:
- Create an asset that runs based on a event-driven workflow
- Create a sensor to listen for conditions to materialize the asset
1. Create an event-driven asset
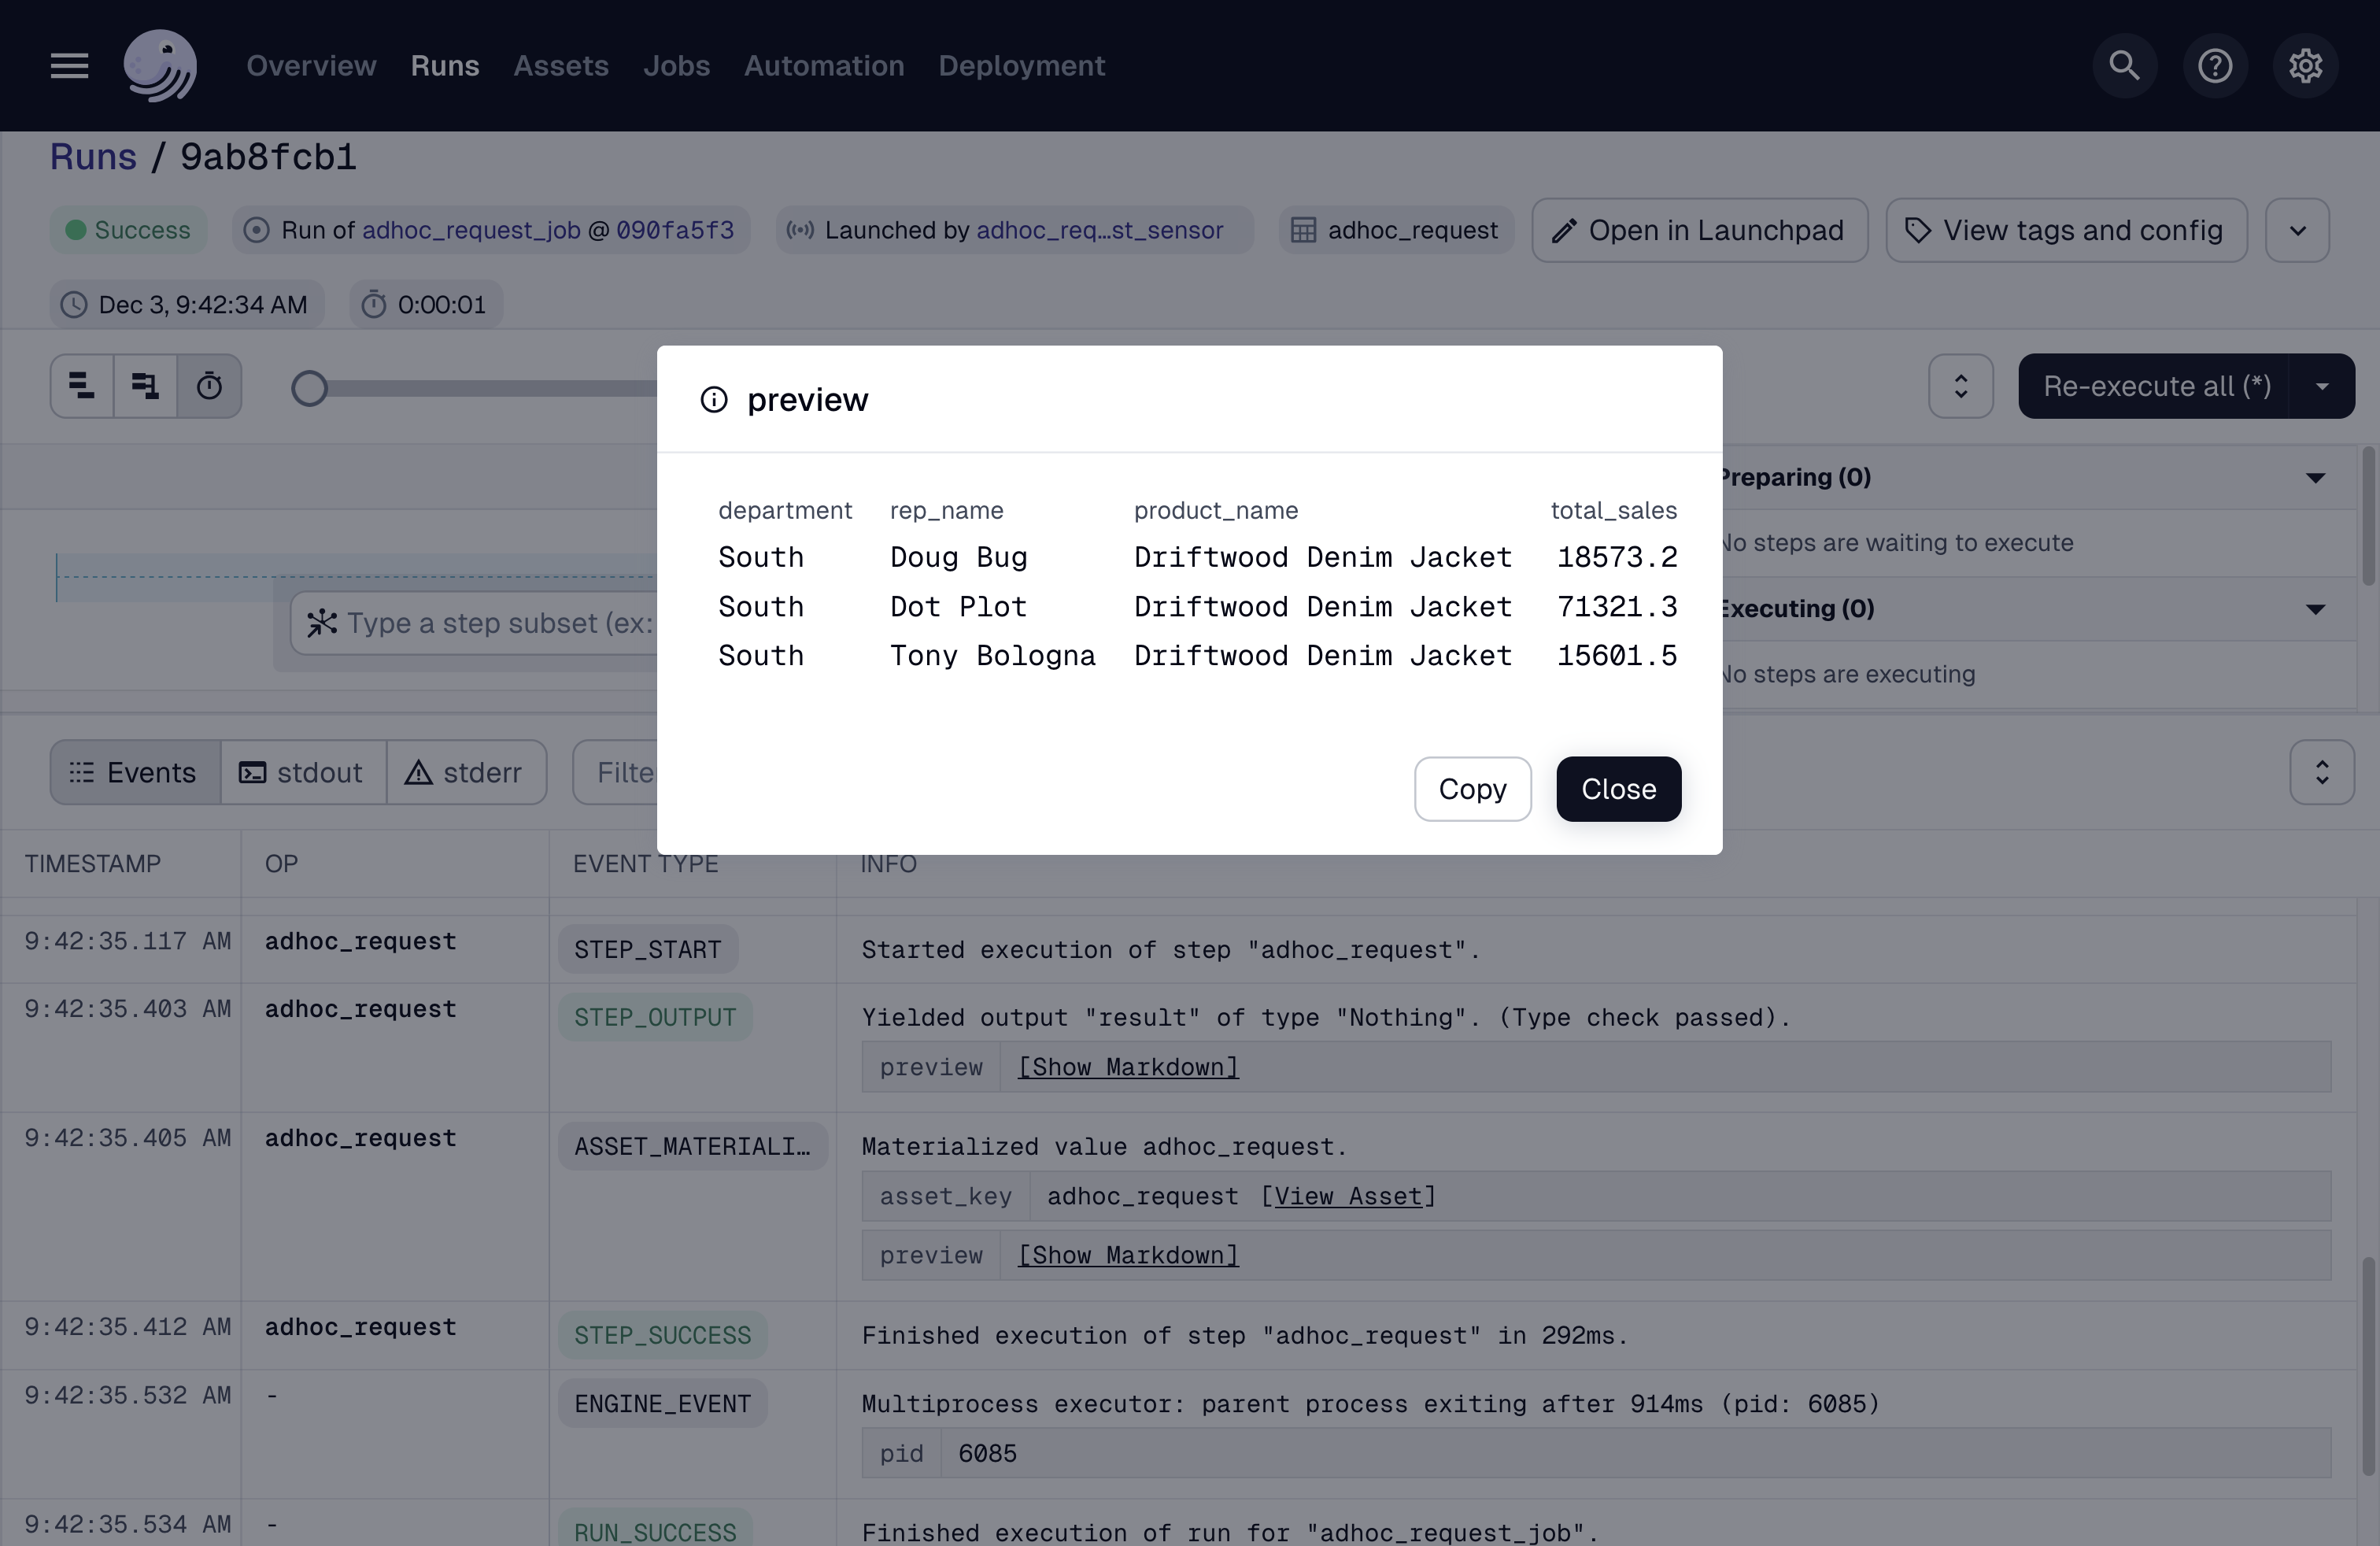
For our pipeline, we want to model a situation where an executive wants a pivot table report of sales results by department and product. They want that processed in real time from their request.
For this asset, we need to define the structure of the request that it is expecting in the materialization context.
Other than that, defining this asset is the same as our previous assets. Copy the following code beneath product_performance.
class AdhocRequestConfig(dg.Config):
    department: str
    product: str
    start_date: str
    end_date: str


@dg.asset(
    deps=["joined_data"],
    compute_kind="python",
)
def adhoc_request(
    config: AdhocRequestConfig, duckdb: DuckDBResource
) -> dg.MaterializeResult:
    query = f"""
        select
            department,
            rep_name,
            product_name,
            sum(dollar_amount) as total_sales
        from joined_data
        where date >= '{config.start_date}'
        and date < '{config.end_date}'
        and department = '{config.department}'
        and product_name = '{config.product}'
        group by
            department,
            rep_name,
            product_name
    """

    with duckdb.get_connection() as conn:
        preview_df = conn.execute(query).fetchdf()

    return dg.MaterializeResult(
        metadata={"preview": dg.MetadataValue.md(preview_df.to_markdown(index=False))}
    )
2. Build the sensor
To define a sensor in Dagster, use the @sensor decorator. This decorator is applied to a function that evaluates whether the conditions for triggering a job are met.
Sensors include the following elements:
- Job: The job that the sensor will trigger when the conditions are met.
- RunRequest: An object that specifies the configuration for the job run. It includes a
run_keyto ensure idempotency and arun_configfor job-specific settings.
adhoc_request_job = dg.define_asset_job(
    name="adhoc_request_job",
    selection=dg.AssetSelection.assets("adhoc_request"),
)


@dg.sensor(job=adhoc_request_job)
def adhoc_request_sensor(context: dg.SensorEvaluationContext):
    PATH_TO_REQUESTS = os.path.join(os.path.dirname(__file__), "../", "data/requests")

    previous_state = json.loads(context.cursor) if context.cursor else {}
    current_state = {}
    runs_to_request = []

    for filename in os.listdir(PATH_TO_REQUESTS):
        file_path = os.path.join(PATH_TO_REQUESTS, filename)
        if filename.endswith(".json") and os.path.isfile(file_path):
            last_modified = os.path.getmtime(file_path)

            current_state[filename] = last_modified

            # if the file is new or has been modified since the last run, add it to the request queue
            if (
                filename not in previous_state
                or previous_state[filename] != last_modified
            ):
                with open(file_path) as f:
                    request_config = json.load(f)

                runs_to_request.append(
                    dg.RunRequest(
                        run_key=f"adhoc_request_{filename}_{last_modified}",
                        run_config={
                            "ops": {"adhoc_request": {"config": {**request_config}}}
                        },
                    )
                )

    return dg.SensorResult(
        run_requests=runs_to_request, cursor=json.dumps(current_state)
    )
3. Materialize the sensor asset
- Update your Definitions object to the following:
defs = dg.Definitions(
    assets=[
        products,
        sales_reps,
        sales_data,
        joined_data,
        monthly_sales_performance,
        product_performance,
        adhoc_request,
    ],
    asset_checks=[missing_dimension_check],
    schedules=[weekly_update_schedule],
    jobs=[adhoc_request_job],
    sensors=[adhoc_request_sensor],
    resources={"duckdb": DuckDBResource(database="data/mydb.duckdb")},
)
-
Reload your Definitions.
-
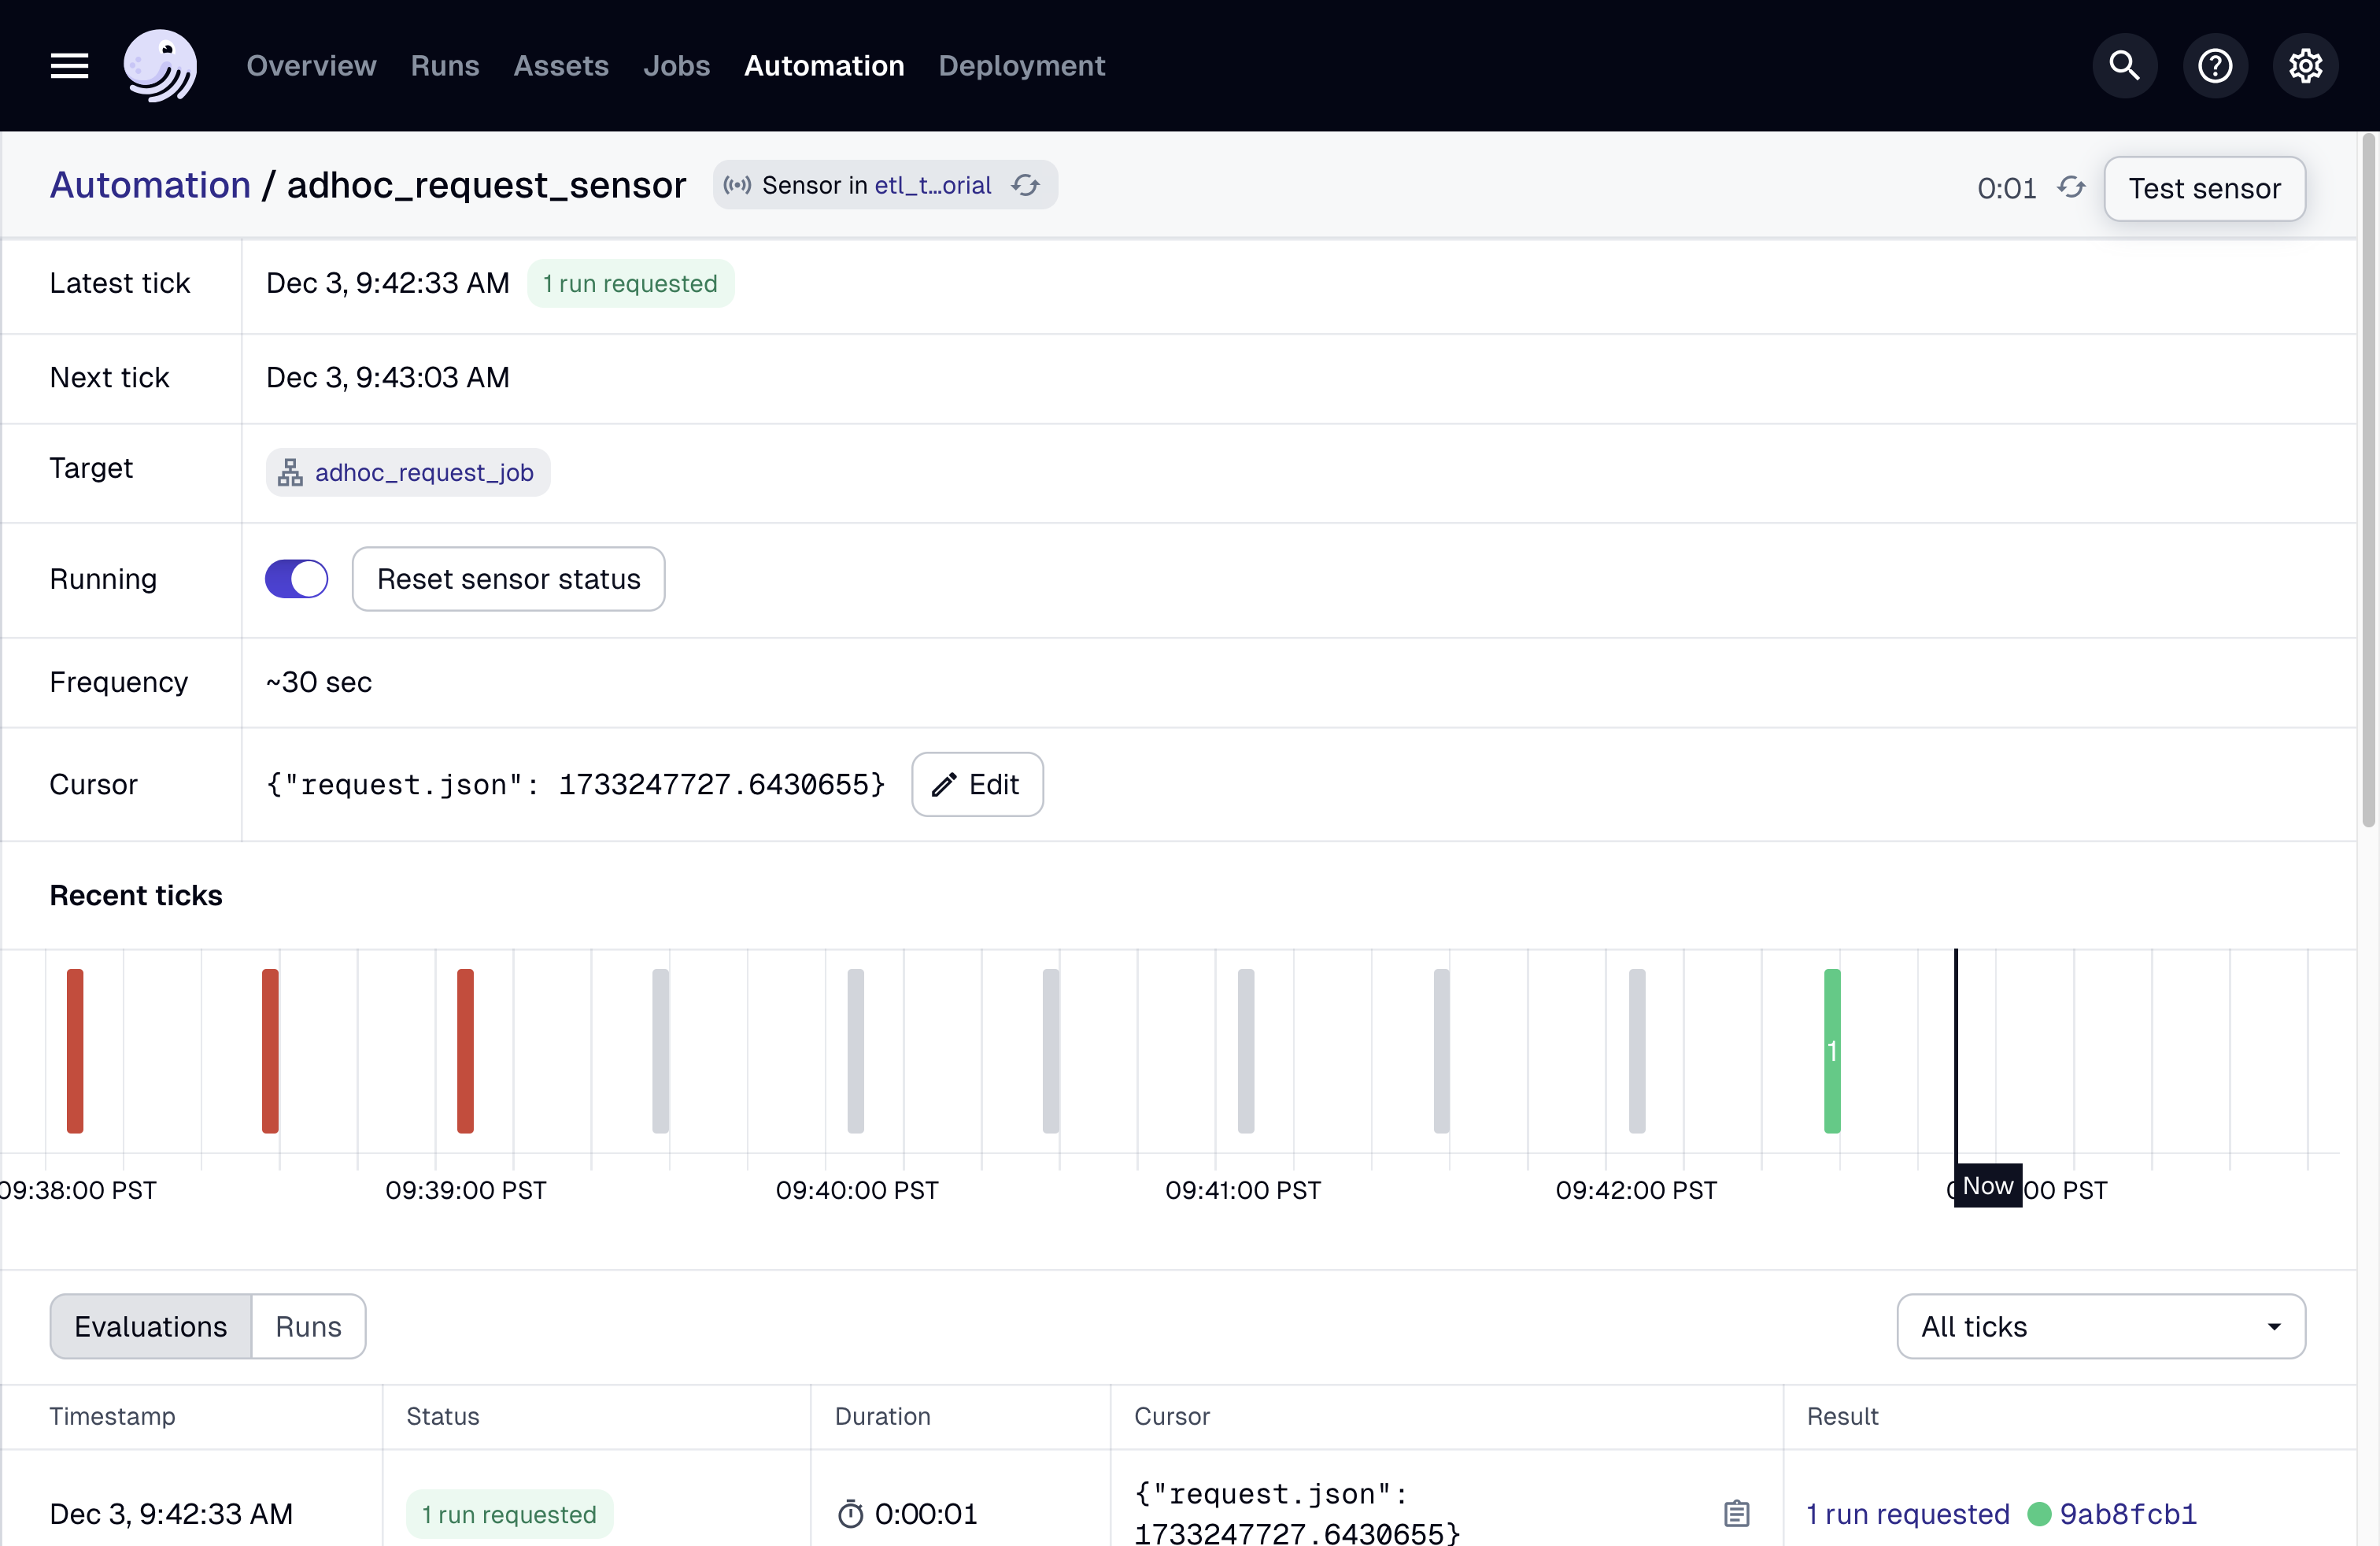
Navigate to the Automation page.
-
Turn on the
automation_request_sensor. -
Click on the
automation_request_sensordetails.
-
Add
request.jsonfrom thesample_requestfolder torequestsfolder. -
Click on the green tick to see the run for this request.

Next steps
Now that we have our complete project, the next step is to refactor the project into more a more manageable structure so we can add to it as needed.
Finish the tutorial by refactoring your project.